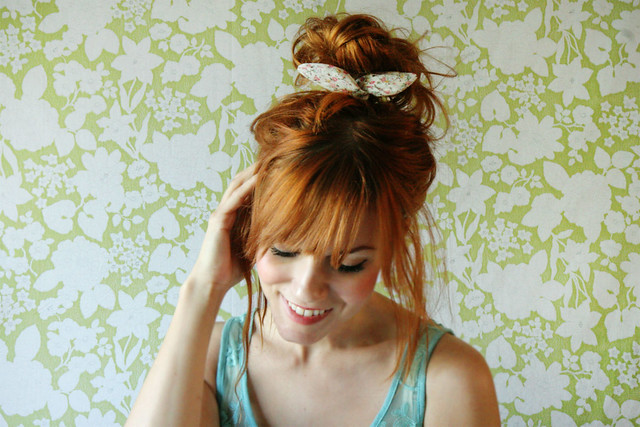
I'm always looking for fun hair accessories to add to my collection. Here's a quick little wire bow DIY project to add a little flair to pony tails, buns, and braids!
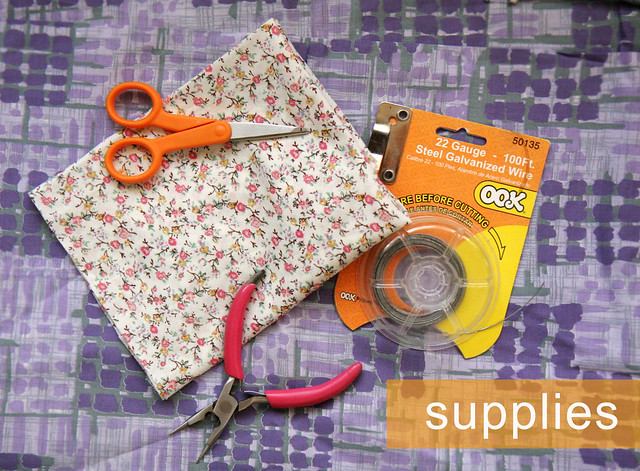
Supplies needed: pretty fabric (thanks, Alexa!), wire, wire cutters, and scissors
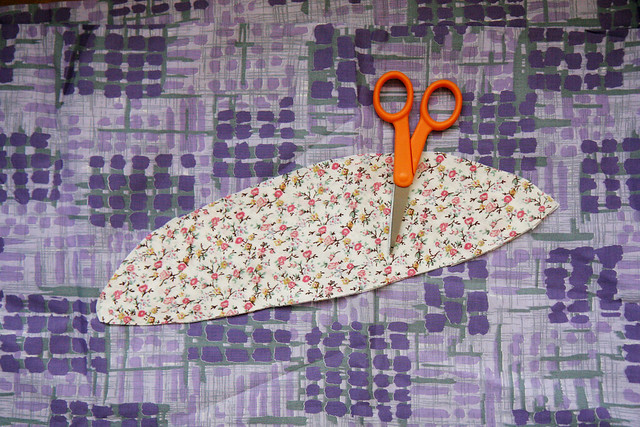
Step 1: cut out a length of fabric (mine was 13 inches). You can make it as long or short as you'd like.
Step 2: sew around the edges of the fabric (make sure the fabric is turned inside out, or printed side down) leaving a small hole unsewn.
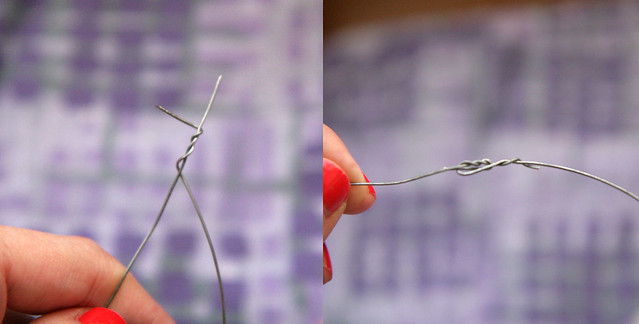
Step 3: take a length of wire that is double the size of your fabric (mine was 26 inches). Twist the ends together and fold down.
Step 4: flip the fabric right-side-out and slide the wire inside. Stitch up the opening and you are done!
I love quick DIY projects and this one doesn't disappoint. I'm pretty sure it took me all of 10 or 15 minutes to create something totally fun to wear!
Happy crafting!


cute!
ReplyDeleteThis is so cute, Katie! <3 You always have the best hair accessories - I'm so excited to be able to make them too!
ReplyDeletex
Lost in the Haze: a Fashion Photography Blog
Love it!!! Can't wait to make one!
ReplyDeleteWhat a neat idea!
ReplyDeleteI love this! What a great idea for fabric leftovers--
ReplyDeletehttp://aclosetintellectual.blogspot.com/
I've been wanting to do this myself for a while now, but I wasn't sure if the wire would slip. Thanks for the extra motivation!
ReplyDeleteReally sweet :)
ReplyDeleteGeorgia
This is really pretty. You could pop it around your wrist too! Lovely xxx
ReplyDeleteWhat a cute idea! I'll have to try it soon :)
ReplyDeletebrilliant. Making these as soon as I get the chance!! ;)
ReplyDeleteThis is so cute! It's perfect for summer. I need something to put my hair up with. I love it. Thank you!
ReplyDeleteI am making these stat. I love this idea.
ReplyDeleteVintagehoneybee.blogspot.com
That's cute! I've made a wire hair bow before too, but this version is cuter!
ReplyDelete-Kate
this is really sweet and so easy to do...have to make my own, thank you for the idea :)
ReplyDeletegorgeous and simple enough for even me to sew! thanks katie :)
ReplyDeleteSuch an simple and cute idea, i love it.
ReplyDeleteZoe
http://gypsiesister.blogspot.co.uk
super cute!
ReplyDeleteI love this idea, it is such a sweet hair accessory.
ReplyDeleteNatasha x
thenightiswild.blogspot.com
This is so cute!
ReplyDeleteI normally wouldn't do this, but as a long time reader I'd SO appreciate your help! :D Please go to my blog and read this post, I just need your help winning a HUGE contest in my life. I promise it'll be worth your time :D It's really easy too!
http://tynee-treasures.blogspot.com/2012/05/electric-forest-hoop-troupe-contest.html
(really sorry if this is serious spam for you)
So cute! I'm going to try this...TFS.
ReplyDeletehttp://bisous.typepad.com/bisous/
I love this. <3
ReplyDeleteOhhh I love what you've done with the fabric, it's super pretty! I may even have to try this myself.
ReplyDeleteSincerely, Alexa x
That's adorable! I can't wait to try it~
ReplyDeleteThat is a really cute idea and it could work great for so many projects. Thank you for sharing!
ReplyDeletehttp://spellboundstyle.blogspot.com/
That's so addorable, you always come up with nice ideas Katie ;)
ReplyDeleteI love your hair color! Is it naturally red?
ReplyDeleteThis DIY is great! Btw, I love the blog re-design.
ReplyDeleteThat would be perfect for my hair! It is constantly slipping out of scarfs if they aren't tight enough.
ReplyDelete- Angela Marie @ http://sunkissedivory.blogspot.com
Aren't you smart! I never would have thought of something so simple and cutesy! This is why I love other bloggers who DIY as I can never come up with things like this!
ReplyDeleteI must make one of these ASAP! So cute!!
ReplyDeleteI just made this! except I expanded it into a longer headband for my little sister, who was longing for something similar to this. http://www.modcloth.com/shop/hairaccessories/headband-meeting-headband
ReplyDeletethis tutorial was so helpful, thanks for posting!
Very cute! I'll have to try this.
ReplyDeleteLooks funny!! Thanks for sharing!
ReplyDeletex
awesome. I'll feature it.
ReplyDeletethanks for sharing, my daughter has been asking me to make this for her :)
ReplyDeleteAdorable! Thanks for the tutorial. :o)
ReplyDeleteyour blog is so lovely! I share lots of DIYs in my blog too!
ReplyDeletemight just make this one soon! haha
Neat to bad I have no sewing skills.
ReplyDeleteWhat a cute idea! You look adorable!
ReplyDeleteSuper cute. These would make great gifts.
ReplyDeleteIt looks fantastic on you! Such a simple but wonderful idea!
ReplyDeleteOMG. i had surgery on my thumb last week and have been trying to figure out how to pull my hair back with one hand. by george, i think i've found it!! :)
ReplyDeleteI look great. I love that idea...chilling and simple!
ReplyDeleteThis is a lovely way to look good on a day I don't wash my hair. The will distract everyone from the messiness. Thanks!
ReplyDeleteHi
ReplyDeleteI shared this post on my blog:
http://rafaribeiiro.blogspot.com.br/2012/05/daqui-e-dali-19.html
I hope your little visit there. kisses ♥
How cute! I'm in love with that floral! Where did you get it?
ReplyDeleteIt's so cute, thank you for sharing, I'll try it soon!
ReplyDeleteGenius idea :)
ReplyDeleteAdorable and easy. My favorite kind of craft. ^.^
Deletelove it!
ReplyDeleteI tried this DIY and I LOVE it! It's so perfect for the summertime when my hair will be ain topknot most of the time! Now I have something to spruce it up :D Thanks so much for sharing!
ReplyDeleteSuch a great idea!
ReplyDeletedid you use 2 pieces of fabric or one ?
ReplyDeleteGoing to the store right meow to pick up some wire.
ReplyDeleteAnd i just so happen to have stumbled upon the same exact material you're using.
You're super cute, thanks for the tip :)
This was so easy!! I am SO GLAD I didn't spend the $14 on the American Apparel one : ) Thanks!
ReplyDelete